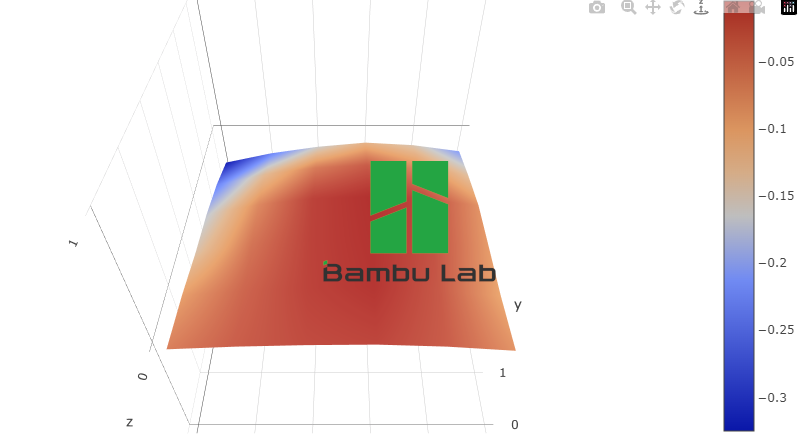
Bambulab Bed Mesh NodeRed Configurator (X1Plus Compatible)
This will work on any version of X1Plus. If you are running OEM firmware on your X1/X1C, it will only work on 01.05.01.00.
Requirements
- Basic Implementation with HomeAssistant and NodeRed
- Pastebin account and/or MQTT Explorer downloaded (see below)
- X1Plus (any version) or OEM Firmware 01.05.01.00.
No more will the automatic bed levelling mesh be hidden on Bambu printers. With this additional NodeRed flow, when you perform a bed level calibration, it will log the data points for you.
While this flow is active, when automatic bed levelling (ABL) is finished, it will trigger an automatic post to PasteBin. There will be a sensor on your printer in HomeAssistant called Bed Mesh Data. When the state is Ready, click on it and expand the Attributes. There will be a link to the Pastebin there.
Since Pastebin has a limit on number of posts you can do in a 24 hour period, there is a backup solution. When the state is Check MQTT, it means it failed to push to pastebin, but still logged the data. If you expand the Attributes, it will then have the topic path in your HomeAssistant's MQTT server that contains the data. You can use MQTT explorer to fetch this. It will always write to here even if Pastebin is successful - but you must have MQTT explorer open and connected before you start bed levelling.
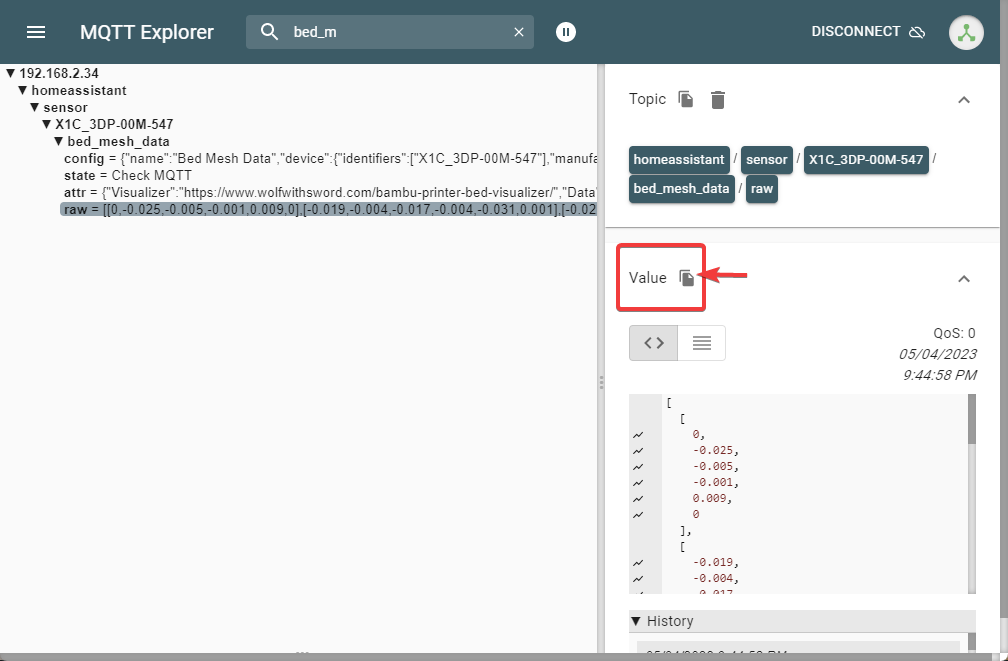
Once copied either from Pastebin or MQTT Explorer, in the Attributes tab of the sensor it will also be a link to the Visualizer Page. On here, simply paste the data into the open text field and click Render Bed Mesh.
Bed Mesh Visualizer
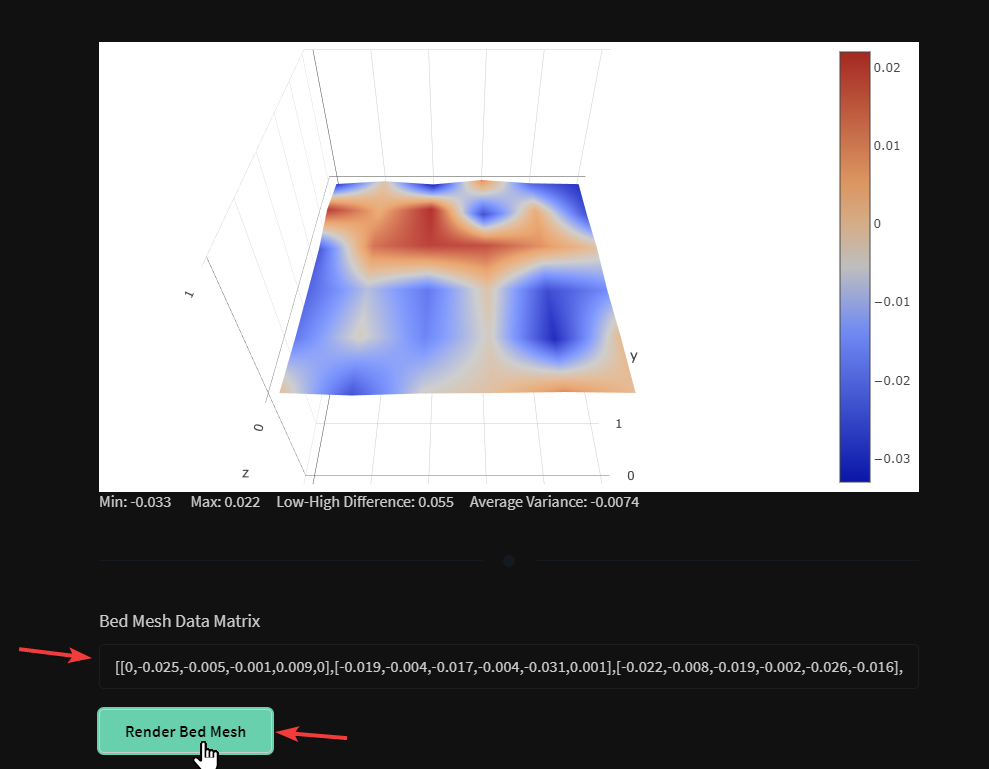
Configurator
You will need a Pastebin account and from there get a developer API key. Once an account is made, you can copy your developer key from here. The reason for needing Pastebin is the amount of data (just Z coords) is still too much to be sent as a single HomeAssistant sensor, and some users may have difficulty with accessing local files from NodeRED.

The printer name must be the same that you used in the original basic flow. If you cannot remember what this was, it will be in the Set Flow Properties node in the Basic Flow as printer_name.

In the same NodeRED flow as your basic implementation for your printer, import the configured flow group.
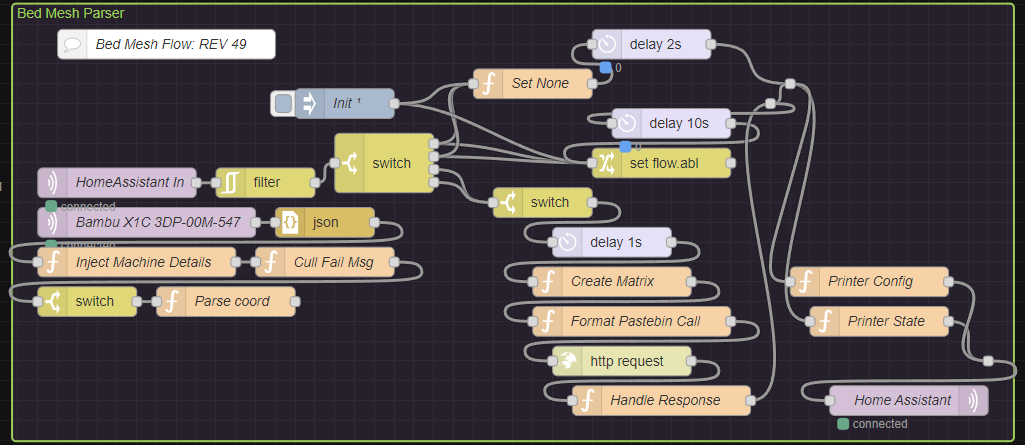
How to Use
To calibrate and tram your bed using this, I would suggest running a bed level only calibration from your printer's utilities -> calibration page (X1C).
Once done, copy the data into the visualizer and check the points. If clearly either the **front left**, **front right** and/or **whole back** is low or high, adjust using the bed level knobs. You do not need to run the tramming gcode.
If after a while you feel you have them as level as possible and still have low spots (try to minimize high spots by getting all three as close to 0 as possible, with lower being better than higher), such as in the corners or edges (or even in the middle), try placing single pieces of blue painter's tape on the bed and re-run the bed level calibration. Keep repeating with adding/removing/moving tape as needed until you are satisfied.
It should only take a few cycles of bed leveling unless your bed is really out of sorts. For my personal printer's bed, I took 1.5 hours because I was testing how far I could go before running into the printer's margin of error (0.02-0.05mm ish). At this point this variation +- from 0 is negligible and I could have completed my testing in less than half the time.
Advanced Version
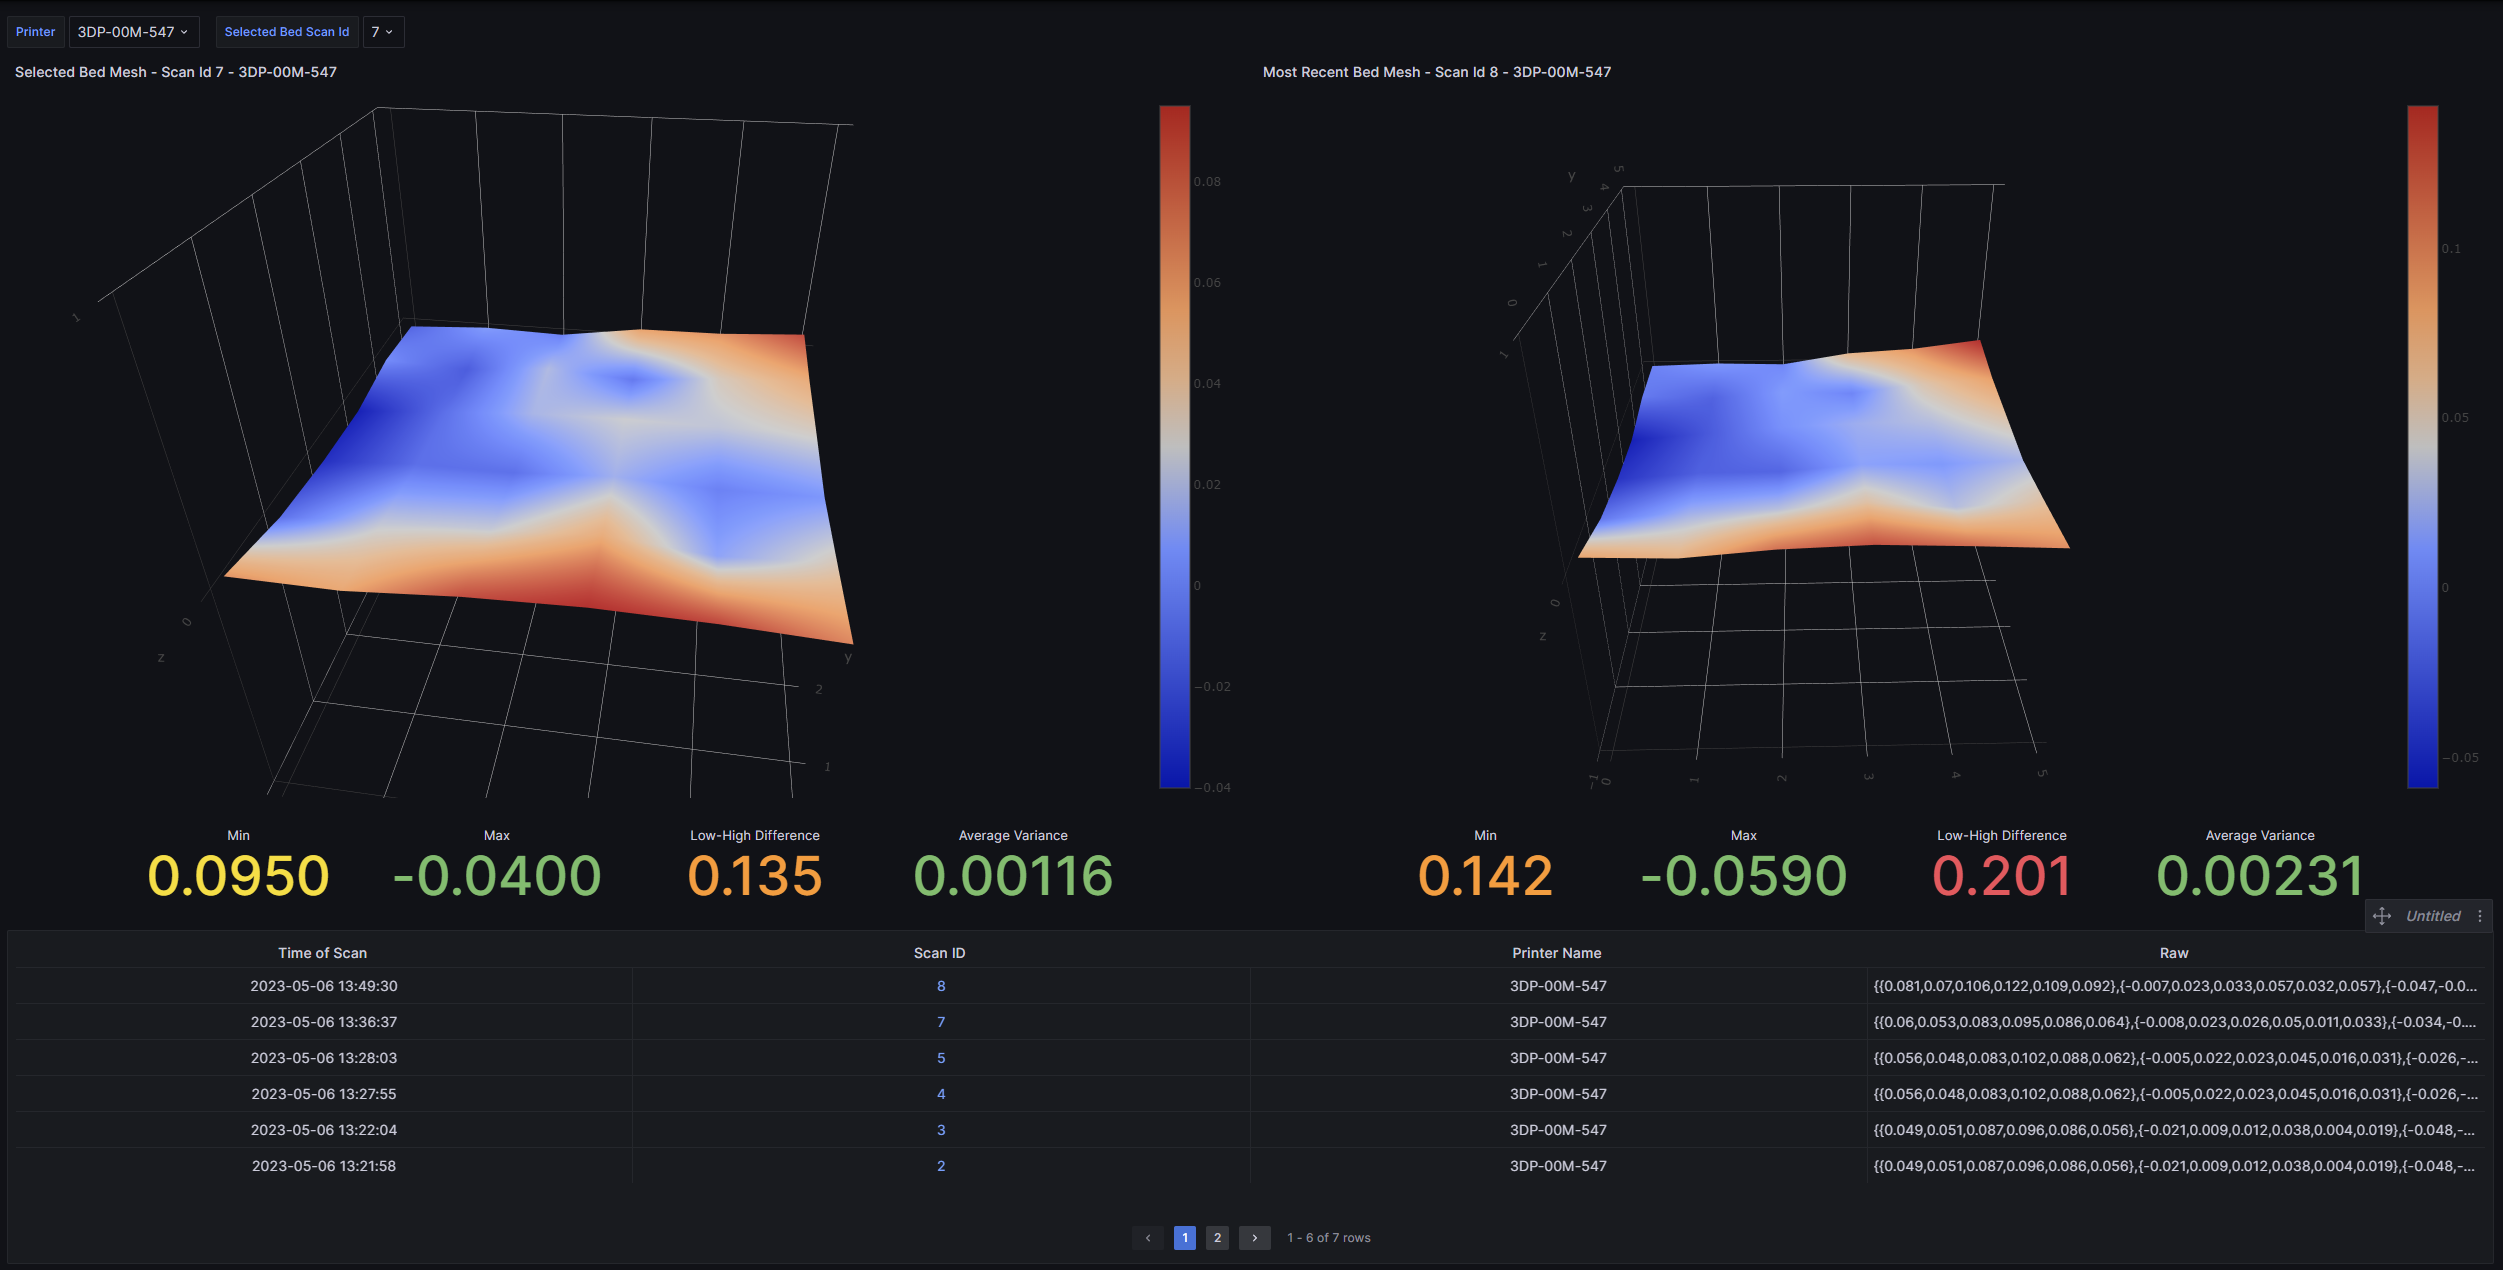
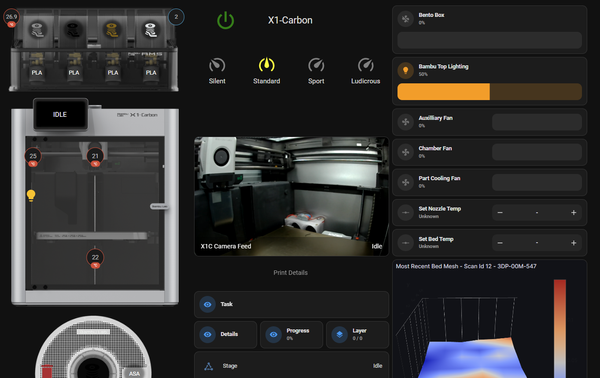
If you would like to setup an advanced version of the bed mesh visualization, there is a new guide for that!
This uses Postgres to store all of your bed mesh data each time you do it, and uses Grafana to let you visualize your most recent bed mesh and compare to any of your previous ones! Bonus, it's completely offline if you self host it, but if you like my website that much, you can still copy the data and view it online here.


